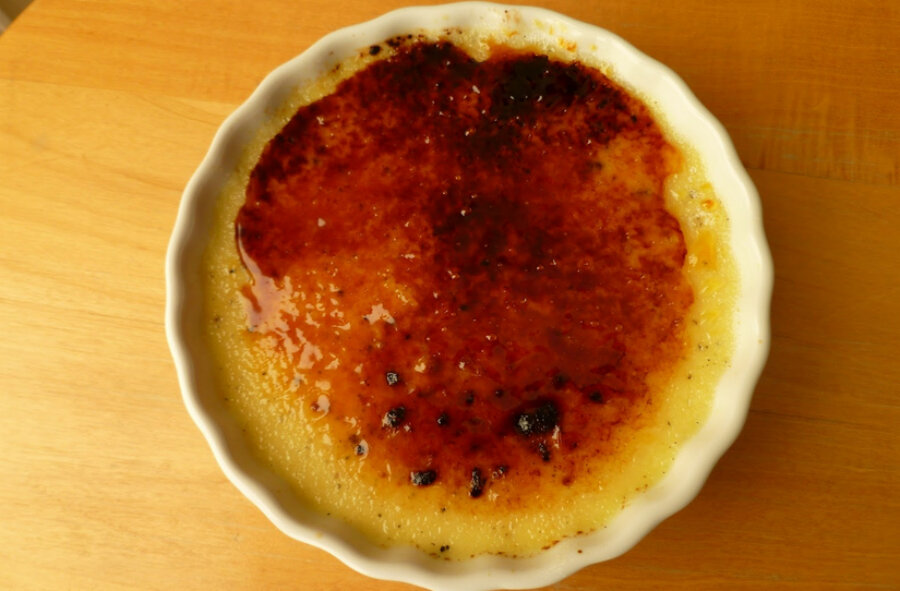
Classic creme brulee
Loading...
I rarely make crème brûlée. For one thing, it’s hard to make for just one person unless you’re going to take just a fraction of all of the ingredients to make one serving. Do you know how hard it is to gauge half an egg yolk? And I would only want to make one serving if it was just for me because no one person should eat double servings of crème brulee. Not if she wants to fit into her clothes the next day.
But I was having friends over for dinner and one of the requested desserts was crème brûlée. Since I hadn’t made it in so long, I thought I’d better do a trial run of a recipe the week before the dinner to make sure I could do it right. How embarrassing would it have been if I screwed up dessert?
Most crème brûlée recipes are pretty simple. Heat the cream, steep with the vanilla bean pod, whisk the egg yolks with sugar, temper in the hot cream, pour mixture into ramekins, bake in a water bath. Seriously, it’s that easy.What is not easy, however, is gauging when it’s done. If you overcook crème brûlée, it’ll be scrambled eggs. If you undercook it, instead of smooth custard, it’ll be liquidy and drippy that will be no fun to eat. To tell if it’s done, you’re supposed to shake it and see if the middle is still jiggly but not too jiggly.
But remember that water bath? It’s not like you can shake the whole pan without risking some of your water spilling into your crème brûlée. And unless you have fingers of steel, you can’t dip in your bare hand to jiggle the ramekin itself. Using a potholder potentially hides the custard you’re trying to tell if done.
Some recipes advocate putting a knife through it and if it comes out with custard (instead of liquidy cream), it’s done. I have never conducted the knife test successfully. For one thing, I don’t like making the knife slit into my custard; it ruins the smooth surface of the top to make a cavity in it. For another, it’s still hard for me to tell if it’s done or not based on the custard smear on the knife. So I do the jiggly test very carefully, making sure the water doesn’t spill over into the ramekins.
Even then, I’m not always sure whether it’s still too jiggly or not jiggly enough. Remember, the custard will also “set” once it cools. So you won’t know how done (or not) the crème brulee is until after you’ve taken it out and chilled it thoroughly.
This one turned out okay, once I stopped second guessing myself. It still had a bit of a jiggle in the middle when I took it out but once I had chilled it overnight and then bruleed the top, it turned out pretty well.
If you do happen to undercook your crème brûlée, after you brûlée the sugar on top, put it back in the fridge for a few minutes to firm it back up.
The taste was smooth vanilla creaminess. The only thing I wish had worked better is all the vanilla bean seeds from the vanilla bean pod I used sank to the bottom. Other than that, I thought this was a pretty good crème brûlée.
Crème brûlée
From Cooking Classy
4 cups heavy cream
1-1/4 cups granulated sugar, divided
1 pinch salt
8 large egg yolks
1 vanilla bean
1/2 teaspoon vanilla extract
hot water for water bath
1. Preheat oven to 325 degrees F. Pour cream into medium saucepan. Scrape seeds from vanilla bean and add to saucepan along with vanilla bean pod. Heat mixture over medium-high heat, stirring occasional, until it reaches a light boil. Remove from heat and let rest 15 minutes.
2. In a mixing bowl, whisk together 3/4 cup granulated sugar and salt with egg yolks until mixture becomes slightly pale. Remove vanilla bean pod from cream.
3. While whisking, pour cream mixture into egg yolk mixture. Stir in vanilla extract.
4. Place ramekins in baking pans. Divide cream mixture among ramekins, filling each nearly full. Pour hot water into pan and fill water level to about halfway up the sides of the ramekins. Bake for 30-45 minutes, depending on size of ramekins until set but centers still jiggle slightly. Cool at room temperature for 30 minutes then transfer to refrigerator to chill 3 hours.
5. Remove from refrigerator and let rest 20 minutes, then sprinkle tops evenly with remaining sugar. Holding a hand-held kitchen torch, about 4 inches from sugar, evenly brown sugar. Remove flame just before desired shade is reached. Return to refrigerator and chill 20 minutes. Serve cold.
Related post on The Pastry Chef's Baking: Black and White Creme Brulee


